
How to Install a Showit Template Using a Design Key
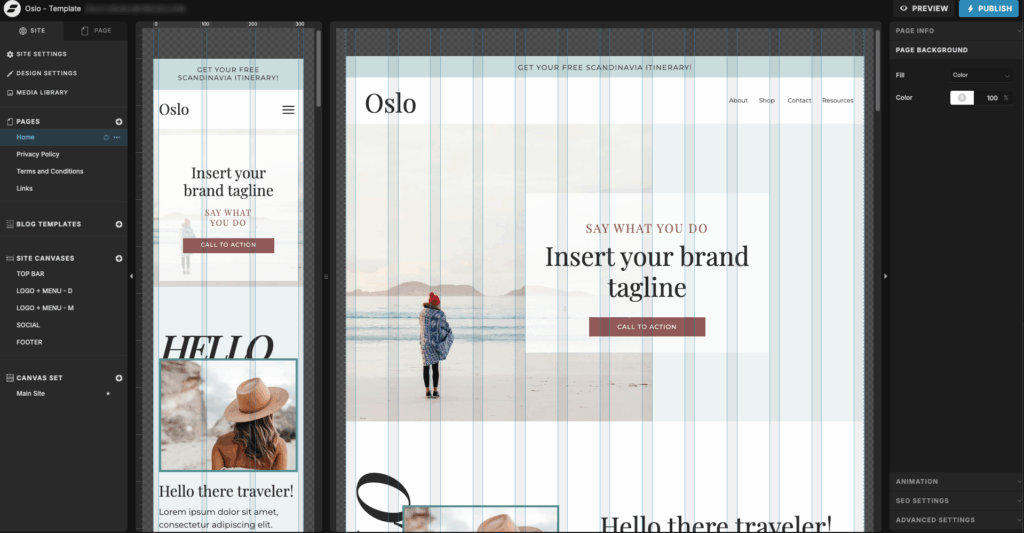
If you’ve just purchased a Showit template and received a Design Key, this step-by-step tutorial will guide you through the entire setup process. Whether you’re using one of my templates (like the Oslo Template) or another designer’s, this walkthrough will show you exactly how to install your new Showit design and get it ready for customization.
This guide is perfect for beginners and will help you confidently connect your new template to your Showit account so you can start designing your website right away.
This video shows you how to install a Showit theme using the Design Key from the PDF you received when purchasing one of my templates. I’ll be using the Oslo Template as an example, but the steps work for any Showit design that includes a Design Key.
Note: Some parts of the video are blurred intentionally. If screenshots from this tutorial appear elsewhere online, I prefer not to have my name visible on them. 😅
1. Log in to your Showit Account.
From your Dashboard, click “Edit My Website.”
Note: If your screen doesn’t match the first screenshot when you enter the editor, don’t worry. Continue to the next image. You’ll arrive at the same place by the end of Step 2.

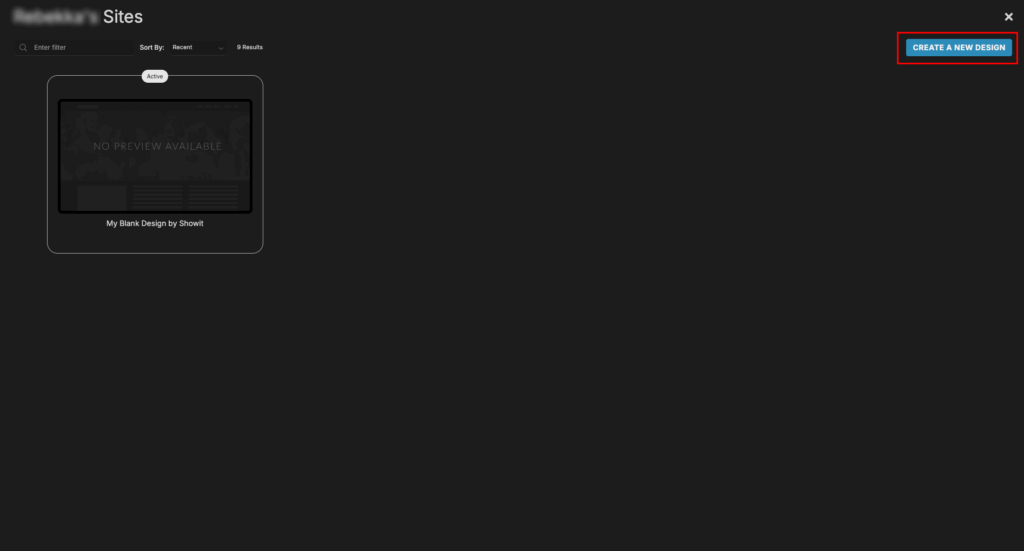
2. When you enter the website editor, you might end up on the last design you were working on. This usually happens if you have only one design installed.
If so, click your name in the bottom left corner, then click “View My Site Designs” when the pop-up appears.


If you have more than one design installed, you’ll likely land on your Site Designs page.
From here, click the blue “Create a New Design” button in the top right corner.
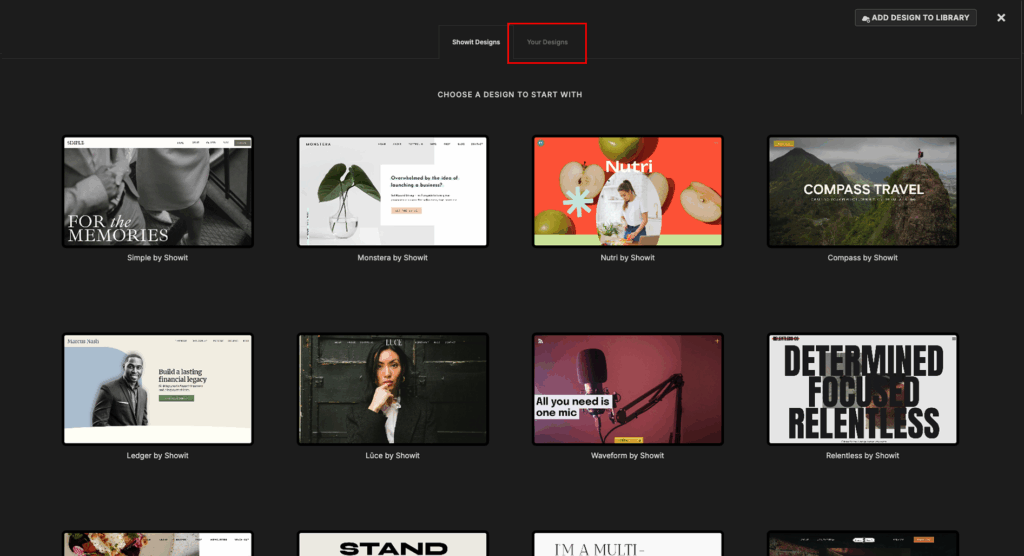
If you are brand new to Showit, this will probably be the page you will see when entering the Website Designer.
From here, click “Add Design to Library.”

3. In the pop-up that appears, you need to paste the Design Key Code from the PDF you received when purchasing the template (#1). Then click “Add Design” (#2).

4. Once your design is added, a preview will appear. Click the blue “Start With This Design” button.

5. You’ll now return to the “Choose Your Design” page. Click the “Your Designs” tab at the top.
6. Find the theme you just installed and click on it.

7. The same preview will appear again. Click “Start With This Design.”

8. Wait a few seconds while Showit installs your theme.
That’s it!
Your new Showit template is now installed and ready to customize. You can start swapping out text, photos, and colors to make it your own.
If you’re looking for more guidance, check out the other tutorials and blog posts on my website for tips, tricks, and design inspiration to help you make the most of your new theme.